Showing posts with label Sizzix. Show all posts

Monday, March 23, 2015

1 Stamp - 5 Ideas

One of the things I love about stamping is that the same stamp can be used to create so many different looks.   This stamp is a dress pattern stamp by Wendy Vecchi from the set called Fashion Style and Art  (SCS 032). 


Here are pics of the stamp on 5 different projects.


Bright and cheery - I paper punched the little heart, there is a tiny button on the red dress and the little black flower is a baby prima with a little orange glitter dot in the middle on the pop dotted orange dress in the middle. 

This is a vintage look!  The dress and skirt were stamped on white tissue paper that I sprayed with tea dye reinker mixed with water in a mini mister.   The background piece was stamped with the green dots from the set before it was embossed.  After it was embossed I inked the surface with tea dye and red marker on the vertical lines and green marker on the horizontal lines.  Staples and buttons finish it off.


 Entirely different look - more of an art journaling/modern look.  Painted tag, stenciled with blue ink, stamped with the dress stamp in jet black archival and finished off with lots of ribbon and a word charm.  I like attaching them with regular safety pins - a good buy with a coupon at Joann's.


Even small stamps can almost always be used to make a  background.  The focus here is the black die cut which is decked out in hounds-tooth paper and gems.  Red, black and white is a classic combination that you can't go wrong with!


Sweet, country Birthday card.  The dress was stamped on printed paper before being cut out; all the papers are Basic Grey.  The paper was from a 6x6 pad which gives you the right scale for this size stamp!


Saturday, May 14, 2011

Vintage Card Class in May

Thursday night, May 19th 6:00-8:30 pm
Sunday afternoon, May 22nd 1-3:30 pm


OK, a little steam punky, a little odd...the inside is my current fav Wendy Vecchi stamp....
¨She was a stylish, with a little bit of attitude¨


A new technique, easy, but adds a lot of depth to a project


When you cannot find the right old vintage photo...make your own!

This is my graduation card this year....could be used for many occasions or ¨just because!¨


OK, Jessica is going to yell at me for this one.....cute ATC...BAD, BAD photo!

you get the idea though....

hope you can join us!!

Sunday, April 10, 2011

Vintage Card Class

with a touch of Steam Punk tossed in!

4 cards and a tag....


First the SteamPunk! I couldn´t resist - somehow the new Graphic 45 and the Ten Seconds Studio just called for a little humor. Don´t like the heart? You could put a bird in your cage...no problemo!


Little hard to see, but the tag uses the large Book Cover stamp as well as the new fleur de lis movers and shapers. I am often asked ¨why tags?¨ ¨what am I supposed to do with it?¨ ok, here is my why...it is a nice surface to work on, it is a good size, there is a lot of freedom in working on them ...you do not have a big investment in them so it is easy to experiment and see what you come up with! what do yo do with them? lots of different things....use them as bookmarks, use them as an element on a scrapbook page - put journaling on them if you wish, make them the focal point of a card, swap them with other tag fans, use them as a gift tag, mount a themed group on a canvas, just collect them....you get the idea...whatever you want to do!


Needless to say, when I say this stamp set i fell head over heels for it. He had me at Paris. Or perhaps the butterflies....there are lots of color ways you could go here, but I love the warmth of the wild honey....


Dusty Concord remains one of my favs and I love the backwards script stamps....we will do the embossing folder trick with these cool stamps and make the fluffy flower. I will admit to being addicted to the tissue flower. Ever since I learned how to make them about a month ago, they are showing up on everything I make!


´
And always it seems, a little sewing theme. We will make the little needle book and you can write secret messages in it! The ric rac is Vintage...the spool is from the 40´s or the 50´s and I have so much I can share! Good chance to try the resist and glassine papers if you haven´t had the chance yet.

Hoping you can join us for the inky goodness....

Sunday, April 17th from 12:30-3:00 or Tuesday, April 19th from 6:00-8:30 pm.

Sunday, March 27, 2011

Vintage Card Class - April


Here is one of the cards....2 new stamps, 1 new die and 1 old die, and a pair of fun techniques!

Wednesday, March 16, 2011

Alcohol Inks with a Twist of Easter


OK, you need to use your imagination a little on this one.....imagine the pink printed piece is adhered to a square yellow card base! Paper by We ´r Memory and stamps by Stampendous.


Sorry the glare is a little bright, but it was tricky catching the shred in the basket....and guess which Tim Holtz Sizzix die this is! Punch by Martha, Stamps by Stampendous and paper by We ´r memory.


A new Sizzix embossing folder...some liquid pearls...and a lot of purple ink....


polka dots are always fun....stamps by Stampendous, paper by We ´r Memory


Tim Holtz stamps....and an unknown egg stamp...

Class on Thursday night, April 6th from 6:00-8:00 and Sunday, April 3rd from 12:30-2:30.

Friends Canvas


This 9x12 canvas was designed to feature a 4x6 or 5x7 photo of you and your best friends....or your sisters....or even your family. I will bring a stamp that says sisters and one that says family in addition to the friends stamp.

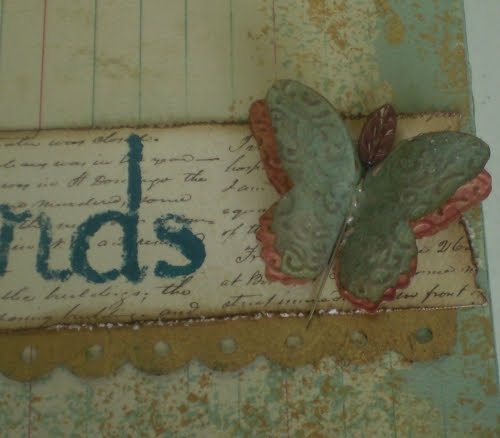
Here is a close up of the butterfly which I seem to have been using a lot lately...


And here is a close up of the dress form, mini mini mini rosette, angel wings, et. al. I must have been die happy the day I made this! I count 6 on this canvas!


Things to bring to class: Tea dye or vintage photo distress ink and a blending tool, juniper and gold paint dabbers, your photo(s) and your scissors and beacons of course!


Class will be held in both Bloomington and Rochester! At Scrapbooks Too on Thursday, April 14th from 6:00-8:30 and Sunday, April 10th from 12:30-3:00. At VIP Scrapbooks on Sunday, March 27th from 11:00-2:00.

Sunday, January 16, 2011

Alcohol Inks with a Twist of Valentineś


This might be one of my all time favorite cards although I am pretty sure the photo does not do it justice - LOL!

Not quite done...but here are the first two...watch for the other 3 on Tuesday morning!

Sunday, November 28, 2010

7 Gypsies Christmas Tray Class

Make a Christmas themed 7 Gypsies Tray using Girls Paperie paper, stamps and die cuts. It holds 1 4x6 photo and 2 wallet size photos, although you could easily rearrange it to include 2 4x6 photos. Traditional reds and greens make it a good gift for that hard to shop for person on your Christmas list. Feel free to bring your pictures to class so you can walk out with a finished project.

Sunday, December 5th from 12:30-3:30 and Thursday, December 9th 10:30-1:30 and 6:00-9:00.


Stop by the shop to see the 3-D goodness of this fun project.

Alcohol Inks with a Twist of Christmas

A few new techniques, some gorgeous colors....Thursday, December 2nd, at both 10:30 am-12:30 and 6:30-8:30 pm and Saturday morning, December 4th from 10:30 to 12:30. And I will be teaching this class at VIP in Rochester on Wednesday, December 8th!


Poinsettia....


a little Christmas joy using the new Tim Holtz die cut


a little stamping and coloring with Alcohol Inks....


AI and paint....on acryllic....


and finally, a little Christmas plaid....using Tim Holtz Christmas stamps!

Join us for some fun, some new techniques and 5 more Holiday cards for your stash!

Friday, August 13, 2010

Simon Says Challenge #1: Wings


This tag is called ¨The Birds and the Bees¨. OK, they both have wings. The bee is a Tim Holtz stamp and the bird is of course from the TH cage sizzix die. The background is Gold Smooch Spritz, the ink is jet black archival and the birds are cut from a cosmetic package - lovely, thick glossy black paper. I hand cut a little necktie for Mr. Bird and Ms. Bird is wearing pearls from Kaisercraft. Thatś it - sort of off in a different direction but that is where my mind was wandering on this hot August day...

Wednesday, August 11, 2010

Grunge Roses Class


This fun class is all about the flowers!! We will make grungepaper roses ala Wendy Vecchi as well as other flowers. You will make 3 grunge roses of different sizes so you get lots of practice. We will use the Sizzix Tim Holtz Tattered Florals die to make grungepaper flowers swhich we will cover with dictionary paper for that vintage look and use another izzix die to make little teeny paper roses.

Monday, July 5, 2010

Intro to Embossing Folders


This is an intro class for those who want to learn the basics of embossing - try embossing folders from both Cuttlebug and Sizzix. Learn the basics of highlighting. If you have a Big Shot, Cuttlebug or Texture Boutique bring it along to class so you can follow right along! The class is on July 14th from 1-3 or 6-8 and again on Saturday the 24th from 10-12.

Sunday, May 9, 2010

Wendy Vecchi Studio 490 Card Class II


The saying is: then the little bird said...

you could leave the inside blank or stamp any greeting!!


The title is a little inaccurate...we will only make three cards but we will make this little sign embellished with a grunge rose...yes, we will make the grunge rose. All the items use the stamps on two Wendy Vecchi sets: Let Your Art Have Wings and Rose Art II. The cards feature the new My Minds Eye Sophie paper...just love the colors in this line and the vintage vibe.


Live life & be content is the message on this one...but feel free to stamp any of the other sayings or a Happy Birthday or Get Well.


This card uses on of the new Sizzix Tim Holtz altered embossing folders. Adds nice depth to the card!

Friday, April 30, 2010

Tag Tuesday Challenge #49: Glitter


LOL - I must have read this on Tuesday and subconsciously had it in my brain when I started working on an entirely different project yesterday making tags for a class. Then this morning I stopped by Louise´ s blog to see who had posted and realized that I had made a glitter tag yesterday. So here it is...color is a little off, but you get the idea. The background is 3 blue and 3 distress inks, the glitter is art insitute (blue on the top and green in the background), the wings are actually silver embossing powder then stamped with the scroll and embossed again with blue glass embossing powder, the purple crown is UTE and for some reason it called out for ball fringe on the bottom. And oh yes, it is a Sizzix die. It reminded me of my daughter so the ¨Drama Queen¨ got added on the bottom.

Tim Holtz Cards for Card Class II


OK, I'll be the first to admit that these 4 are very different in nature. The tag is TIm Holtz style I think. We will do a cool distressing technique with dictionary paper and masking tape. The next one....


uses the bitty grunge set and is just plain fun - and fast!!


Le papillion might have different (coordinating) color antenna - they are made using a common household item... and finally my favorite I think (at least today) is the Bee card - very regal and a much brighter yellow than the photo shows. OK, I get a nice clear picture but the color is bad. One of these days it is all going to come together. The big bee on the ribbon is fun to make - it starts with a little sizzlets die. The class is Wednesday night June 2nd at 6 and Sunday June 6th at noon. Hope to see you there.


Monday, April 19, 2010

Tag- Tuesday Challenge #47

is Inspire Me! I was working on making some samples for a card class and this stamp summed it up the best for me: ¨Dance for yourself, if someone understands good. If not, then no matter, go right on doing what you love.¨ It is stamped on the ticket, although that is a little hard to see in the picture. This is my first post for Tag Tuesday Challenge, ok, my first post for any challenge, but I´ve been reading Kard Krazy by Lousie for quite a while now and enjoy it tremendously. Decided it was time to jump in the pool instead of just sitting on the edge watching....


The edge is misted with Rusty Hinge and Sunflower Sparkle Perfect Pearls and is much blingier than appears in the photo. The inspiration quote is stamped on the back of a ticket.

Saturday, April 10, 2010

Dream Canvas

This is the canvas we did in the dream canvas class in February. It incorporates lots of things we´ve done in the techniques classes. It has Distress Inks blended on the rose, Perfect Pearls misted on the frame and rose, Distress Stickles on the butterfly, crackle paint on the vine and is edged with a gold Paint Dabber. The frame and vine were cut with Sizzix Dies, the grungepaper rose was made using a Studio 490 stamp and hand cut. The paper is from Cosmo Cricket and the dream stamp is a Wendy Vecchi Studio 490 stamp. The quote, script on the rose and script on the canvas edges were all stamped with Sepia Archival Ink. The entire thing was inspired by a Wendy Vecchi canvas design!

Friday, April 9, 2010

The most asked question of the week...

How did you do this???


This is one of the samples I made for the Sizzix sample board featuring the new Tim Holtz Alterations dies. I think it's my favorite, but it has generated the most questions - no doubt. There have been all kinds of guesses about metal, alcohol inks, pigment inks, etc. Just about every time I've been in the store this week someone has wanted to talk about it. It was FAST and super easy....here are the steps:
1) Cut a 6¨ square piece of chipboard with the Scrollwork edge die.
2) Paint it with the Snowcap Paint Dabber.
3) Paint it again with the Pearl Paint Dabber. (I ¨pounced¨ both for texture.)
4) Stamp image in Jet Black Archival Ink.
5) Add black velvet ribbon and little gem on top of Eiffel Tower.
6) Spritz two white flowers with a mixture of Barn Door reinker and Pewter Perfect Pearls in a Mini Mister. When they are dry, stamp with french script stamp in Jet Black Archival Ink. Put pearl brad through flowers and adhere with pop dot.
7) Add year or saying in stickers on bottom left.
8) Punch holes for binder rings on left side.
Presto, you have a cover for a little book. I made one for myself, and cut the papers with the scrollwork edge too! I love how the edge dies cut through chipboard, grungeboard, stacks of paper, even felt.
Have fun playing with the edge dies!

More pics from the Wendy class on April 19th and 25th...

These are two of the cards we will do in class. On the first card we'll use UTE on the bottle to give it a glass look. And yes, the flowers are cut with the Sizzix TH Alterations Tattered Florals die. The colors are muted turquoise and sunny yellow.


This card is alcohol inks....Purple Twilight, Wild Plum, Sailboat Blue and Silver in the background and Wild Plum, Watermelon and Shell Pink on the flower...with some Magenta stickles thrown in for good measure....a girl needs a little bling with her flowers! In the photo the card itself looks blue, but it is purple.


I've tried 3 times to photograph the other card - an I'll try again tomorrow. The fourth piece is the little sign in an earlier post, but here it is again so you don't have to hunt for it!


It will be fun and we'll do 2 techniques we have not done in any class to date! You'll be glad you signed on for this class!